Holiday Recipes YOU will LOVE!


I'm in the baking mode and have been busy this week baking up a storm!  My good friend Sue came over Saturday and we made all kinds of goodies with my girls. My kitchen looked like a cookie factory!  It's a fun tradition we do every year and makes us get in the Christmas spirit.
 
 
 We had tons and tons of cookies and plated them all up and gave them away.
 
Source: Duncan Hines
 I did not make these beauties but am going to give them a try!
 
Aren't these ornament cupcakes from "Duncan Hines" and the above nutcrackers adorable.
 Great school/classroom Christmas party ideas.
 
Source:  Duncan Hines
 
Gingerbread boys would make some school kids giddy!  I've got to try this too!
 
 Shortbread cookies are my all time favorite cookie.  They are buttery and literally melt in your mouth!
Love the bell shapes and flowers we made this weekend.  This recipe is the absolute best and everyone that puts one in their mouth just about falls over with their deliciousness.
 
The ones we made this past weekend are already all gone!
 
Mom's "Easy" shortbread recipe
 
Blend together:
4 sticks butter
1 cup powdered sugar
1 cup cornstarch
 
Add:
4 cups of flour
 
Kneed well and roll out 1/4 inch thick.  Cut into desired designs.  Don't use large cookie cutters, the cookies are filling.
 
Bake at 275 degrees for 15-20 minutes.
 
Sprinkle with icing sugar!
 
I'm going to make another batch this week and decorate them like below!
Red door cookies with gold hardware... 
Black ones will be cute too!
 
I'm in love with these!  I'll post pictures when I'm done :)
 
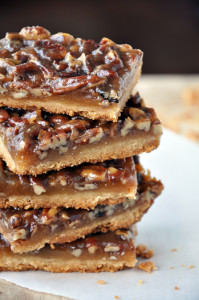
My husband loves pecan pie so I'm making this recipe I found on Pinterest.
 
 He is going to love these  Pecan Pie Bars
 
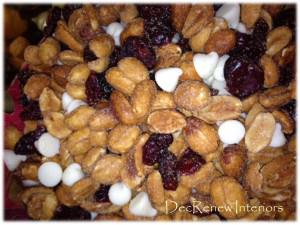
My good friend Terri got me hooked on this wonderful trail mix.  Honey roasted peanuts, craisins and white chocolate chips.  This is what I made for my neighbors last year and will do the same this year. It's Christmasy, colorful and addicting as well as absolutely delicious! 
 
 Easy to make:  equal parts of all three ingredients.
 
Happy baking Ya'll
 
Visit my website DecRenew Interiors to see my Design Portfolio with lots of before and after photo's.
Follow me on Pinterest and on Facebook


Christmas Column & Holiday Decor Inspiration

 
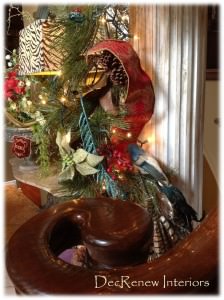
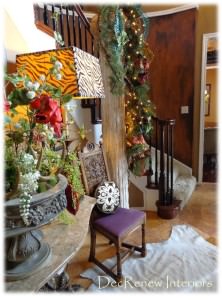
This year I decided to decorate my column for Christmas.  It sits in my foyer and I have always loved it.  It's incredibly special to me because my husband made it for me one Christmas.  I still have memories of him carrying it down the hall on Christmas morning with my then 4 and 5 year  old piggy tail girlie's.  They helped him paint it and sand it! 
 
 
He was so clever.  To embellish the column at the top he used drapery hardware and filled in the holes on the sides and it worked perfectly.
 
Our Christmas tree usually goes where the column is each year but I decided to mix it up this year.
 
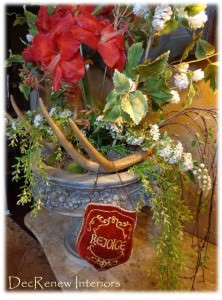
I made this arrangement about 6 years ago and love the concrete urn it's in.  The antlers were added last year.  Hanging a little "Rejoice" to it has made it have a special touch of Christmas and it is a time to Rejoice!
 
  
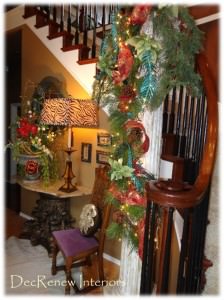
 I created and embellished the garland as I went along and unpacked all my Christmas items. 
 
 
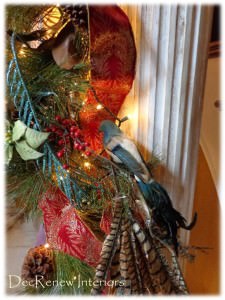
 Added this blue bird and some fun feathers that a client gave me.  The red ribbon is so gorgeous in person.
 
 Something sparkly and colorful always makes me happy and mixes it up a little.
 
 
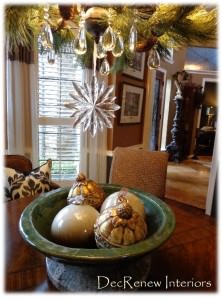
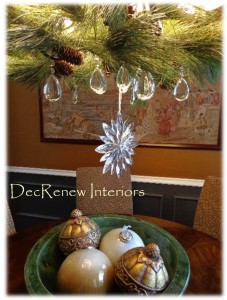
My dining room chandelier was embellished with some garland and a crystal snowflake.
 
 
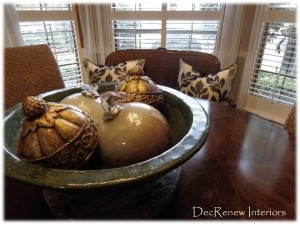
I have slowly added to my "large ornament" collection.  The blown glass ones are my favorite placed in my large green bowl that I keep out all year.  What I love about this centerpiece is that it doesn't have to be moved when we use the table because guests can still see each other. 
 
 
I find that when decorating for Christmas, it's always better to use LARGE scale items instead of a lot of little items.
 
 
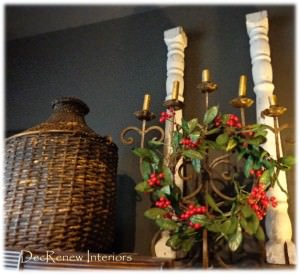
I added this little holly wreath to the top of my armoire.  Hung it on my candelabra.  It seems happy there with the my collection of old stair banisters.
 
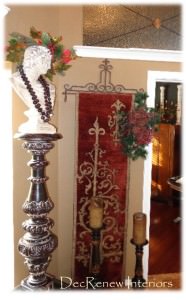
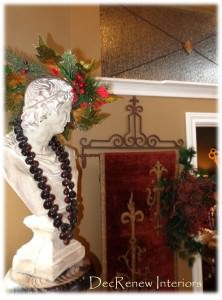
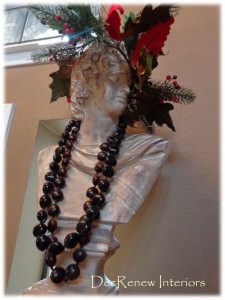
 My bust got put on top of my large candlestick this year.   He watches over me while I work in my office.  You can see a peek into it to the right. 
 
 
The tapestry that hangs in my entry is from the Paris Flea Market (they use to hang in a castle).  I bought 2 and one of them is getting made into a bench as we speak.  Will be a collection from my new One by One collection, coming soon!
 
 
I adorned his head with a holly wreath :)  He always wears my wooden necklaces and I think it makes him look really cool.
 
 
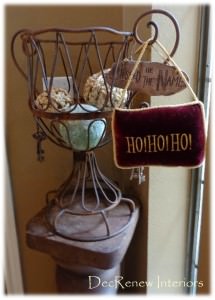
HO HO HO
 
 
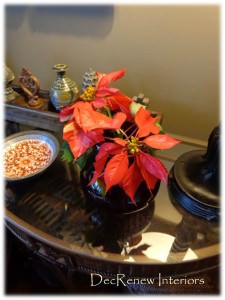
 I bought a poinsettia and placed the stems in different vases around the house.  I got this idea from Lauren Liess at Pure Style Home  last year.  Filed it away in my "Christmas" file in my brain last year and pulled it out this year.
 
 
I added this garland to my wall sconces in my living room.  Layered different kind of garland to give it a nice fresh "real" look.  Again, a little sparkle and fruit  goes a long way.
 
 
Some more of my large ornaments on my mantel.
 
Decided not to do the traditional garland this year.  Wanted something with less fuss.  I'm trying to "simplify" this year so there isn't such a huge put away day! 
 
The garland on my wall sconces is plenty!
 
  
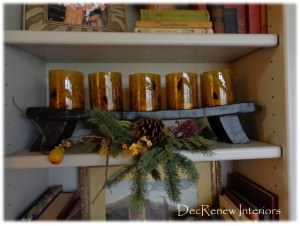
I did add a little greenery to my bookshelf .
 
 
My front door swag got some extra berries and pointsetta's this year. 
 
I also added this little elf boot to the bottom and it's adorable.
 
 
My entry planters got a large red bow and a red berry wreath.  I have one on each side of my entry so they really look great.  Especially when they are all lit up at night!  I put lights in the fur trees and around the wreaths.
 
 
My pansies are doing well this year even though it's been so warm!
 
 
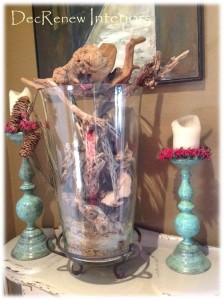
My large glass vase is filled with driftwood I've collected from all over.  I placed berries on the candlesticks and hung a little pine cone and greenery on the lip of the vase.
 
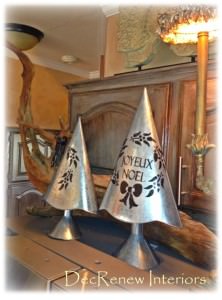
These metal trees I found at an estate sale and stenciled them to make them look more sophisticated.  They are now on top of my refrigerator with the driftwood my husband found for me on one of our beach trips :)
 
 
Hope this post inspired you to mix it up this year.  I love making each year different and maybe you will do the same!
 
 
Visit my website DecRenew Interiors to see my Design Gallery!
Follow me on Pinterest and be inspired this Holiday Season!


New Dining Room & Family Room and a time to be thankful.

What a great install we had yesterday! 
 
I put a Design Plan together several months ago for a client that wanted a Dining Room, Family Room and office transformed "using what she had" as well as incorporating some new pieces.  We had the install yesterday so here are the before and after's.  I was quickly taking snapshots so sorry my pictures aren't as clear as usual. It was getting dark out too and I was trying to finish up so we could do the big reveal! My clients were waiting next door anxiously.
 
BEFORE
 
Previously Formal Living Room
 
My client wanted to change her existing formal living room into her dining room.  They never used this space and she needed an office.  We made her old dining room into a great space for her now to have a desk. 
 
AFTER
 
NOW the Dining Room
 
Painted this room and her "new" office (across the way) a dark rich blue/green.  We transformed her existing chairs by painting them a soft distressed grey.  Her china cabinet got the same treatment. 
 
BEFORE
 
Chairs and china cabinet BEFORE.
 
 She had the parson chairs in storage so we had those reupholstered for each end of the table.  I tried to use as much as "what she had" as possible to save on the budget. 
 
AFTER
 
Painted and waiting to be picked up to be re-upholstered in a great red fabric.
 
 It not only saves on the budget but it gives us the "collected over time" look that I love so much and what my clients usually request!  The table has an extension so we painted and reupholstered ALL the chairs so they can be pulled out when entertaining.
 
BEFORE
 
Old dining room
 
AFTER
NEW DINING ROOM where formal living use to be.  You can see the china cabinet peeking out.  Sorry it's not a great picture but you get the idea.
 
Grandma's silver tray was put on the table and a blown glass vase was added along with the flowers.

Added electric wall sconces and a chandelier. We kept the existing rug and added new draperies and the large mirror. I love how now the mirror reflects the chandeliers in both rooms beautifully.


FAMILY ROOM TRANSFORMATION
 
BEFORE

 
Goodbye yellow paint!  Their family room needed personalizing.  The "matching" set of leather furniture wasn't working for the room and made it feel very dark, especially since they have wood floors throughout. We decided to keep the entertainment center and the large leather couch.  The rest of it got put in another room and we added lighter wall paint and brighter colors.
 
AFTER
 
 
Our rug was the inspiration for the color scheme we went with in this room.  The new custom draperies really add style and height to the room and added the color and pattern we needed.
 
 
 I had the two club chairs made from scratch and they turned out beautifully and are extremely comfortable.  New pillows and some lamps and the room is good to go.  A round coffee table is coming soon. 
 
I asked my client to clear the rooms before I got there and create a shopping room for me.  As I worked throughout the day, I shopped in that room for items to place that were important to their family. 
 
 
I was so pleased with the chairs and they go beautifully with the rug and draperies.  I found these pillows on one of my shopping excursions and thought they brought in the brown from the leather couch and pulled the room together nicely.
 
  
BEFORE
 
 
AFTER
 
 
 The fireplace was painted a darker color and the green dated fireplace surround tile will be replaced eventually with a nice slate tile when the new carpet goes in upstairs. 
 
BEFORE
 
 
See what I mean about everything being the same color?  It made it boring and dull.
 
AFTER
Now it's light, open, fresh and stylish.   Much more like the homeowner's personality!  We add that island light fixture in the background too!
 
 
Getting darker outside by the minute.  My client was scared of this fabric because it resembled an animal print.  However, she trusted me when I told her that it would be the star in the room and she was pleased to see that it was!
 
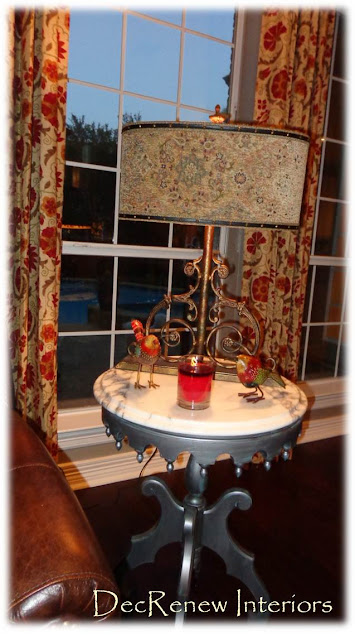
Crazy over this lamp.
 
 
If you follow me on Facebook, you saw that I posted about this little side table.  The base of it was a cherry wood before, passed down from the family.  My client wanted to keep it for memories sake so we gave it a makover.
 
A peppermint candle filled the air during the reveal and these little wooden handpainted birds were a gift from me.
 
 We had it painted this wonderful metallic silver with a turquoise undertone.  Placed the heavy marble on top and it looks fantastic in the room now and totally updated.
 
The inside of the lampshade has a leopard print that is to die for.
 
 
These velvet embossed down filled pillows are one of my favorite things in the room.
 
BEFORE
 
 
AFTER
 
 
Added this beautiful console under the stairs and stacked some of their favorite artwork.
 
I used their existing buffet that was in the dining room in their "new office" and it makes a nice welcoming statement to guests who walk into the entryway!  This rustic metal mirror makes the traditional space feel less stuffy and pretentious.  I wish I had been able to take some photo's of their new office but the lighting wasn't good by that time at all!  I'll have to go back and snap a few.
 
 
I found this glass candlestick holder that was filled with potpourri in one of her rooms and got rid of the potpourri (a dust collector by the way) filled it with moss and artificial floral stems.  No vase needed now and we "used what they had".
 
BEFORE


AFTER
 
 
I learned a wonderful thing during this install!
 I was disappointed  that I didn't get good pictures because of time and it getting dark.  However, when the client came to the door to see the big reveal they were so overjoyed, tears and all.  The neighbors came over and we walked from room to room talking about all the items that had been passed on from family or painted by special people in their lives, I realized something
 at that moment..........
I don't need pictures to capture that moment!  An even better thing to have is that memory of making their house a home for them.  The memory of their reaction (yes it was like on HGTV)  will always be in my heart and that is way better than a picture any day.   That's why I started DecRenew Interiors in the first place.  I wanted to be able to use my gifts that God gave me to help others make their humble abodes feel like a place that they want to spend time with friends and family.  No picture can ever capture what I felt last night and it was a special  gift and a reminder of the blessing of my business.  It was a good way to start the Thanksgiving break with my family. 
 
I drove home  with tears filled in my eyes feeling truly Thankful!
Happy Thanksgiving to all of you! I'm taking the week off to spend with my family!
 
 Visit my website at DecRenew Interiors to see more before and after photo's as well as my Design Portfolio.  Let me make your house a home!

Kitchen remodel just in time for Grandbaby!

6 weeks later and we are done with this kitchen remodel.  Haven't placed any accessories yet but my client had a grand baby yesterday!!!!  Whew we made it just in time!!!
 
This couple wanted a classy, clean and fresh look with little fuss.  They have raised their kids in this home, paid for graduations, college and weddings, etc. etc.  It was now time for them to get the kitchen they so desperately wanted. 
 
BEFORE
(sorry for the fuzzy photo but I really wanted you to get the idea of the horrible before)
 
AFTER
 
 
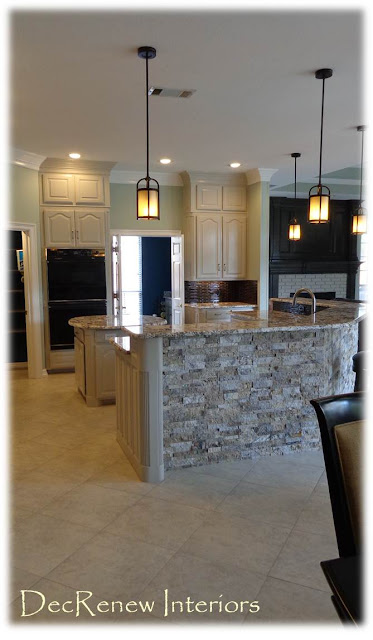
Took the cabinets to the ceiling, added crown molding and painted them a soft gray!
The stacked stone was the one thing that they were really scared about.  It's now their FAVORITE thing about their kitchen.
 
 The black ceramic back splash is out of this world.  Pictures don't do it justice.
 
AFTER
 
The granite and stacked stone are the shining stars in this kitchen!
 
My client started off very scared of change but moved forward trusting me each step of the way as we followed the design I put together, just for them. I was so proud of her! She says she was stretched way beyond what she thought she could do and she is incredibly glad she took those risks.  She LOVES everything now and so does her husband.
 
 
BEFORE
 
 
AFTER
We made the island round to give them more space and add some shape and interest.
 
BEFORE/AFTER
 
 
AFTER
 
 
The gold door handles will be changed soon to brushed bronze by the homeowner.
 
 
See what I mean about the stacked stone? It's like art!
 
AFTER
 
All of her items she only uses once a year are stored up in the new cabinets.
 
AFTER
 
Recessed lighting and pendants make everything feel up to date.
 
  Ruthie Tip:  Don't overdo the recessed lighting, it can make a kitchen feel busy! 


Such a great little work space!  This backsplash makes my heart stop every time I see it!


BEFORE
 
 
AFTER
 
Good bye old lighting!
 
 
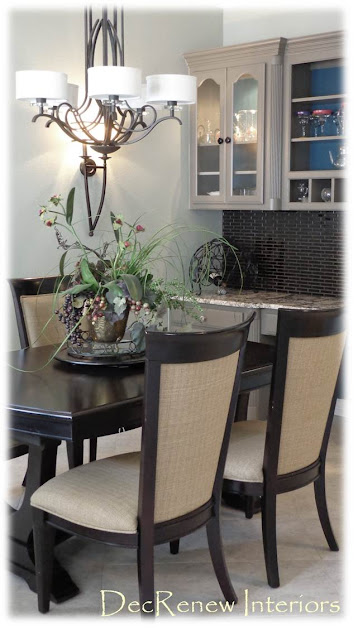
These wall sconces really add some beauty and character to the eating area and can be dimmed as needed for ambiance.
 
BEFORE
 
 
AFTER
 
 
Furniture shopping is next.
 
BEFORE/AFTER
 
 
We modified the mantel some by taking away the "fussy" molding.  We painted the fireplace insert with heat resistant black paint.  We didn't like the pink brick so we had it painted a similar color to the kitchen cabinets and then sanded them down.  Instant change with paint!  Dramatic don't you think?  Amazing how much bigger the space feels now!
 
BEFORE
 
Yikes!
 
AFTER 
 
 
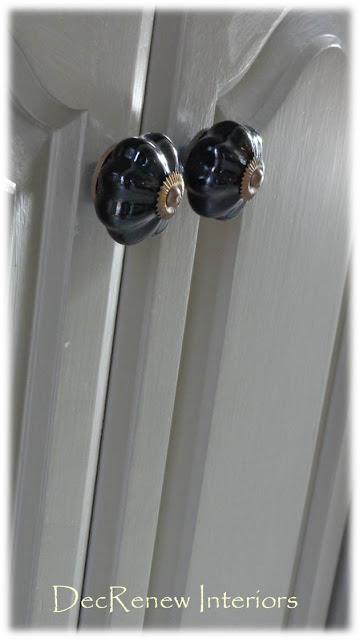
We adjusted the entertainment center to house a bigger TV. Painted and added new hardware. 
It will look amazing when it's all accessorized.
 
 
Don't skimp on your hardware! 
 
The laundry room and pantry got some extra attention too.  Painted this wonderful color blue called "under the sea" by Sherwin Williams.  This color is also in their pantry and behind their bookshelves.   A mini bar will be installed underneath the counter.
 
 
The hardware matches the color of the walls in the kitchen which is right off the laundry room.  Great way to bring the rooms together!
 
 
 Great colorful pantry!
 
 
Their dining room got a transformation too!  Gone with the old floral wallpaper and in with a powerful red that makes a statement when you walk in.  Hardwood floors were installed throughout the entire home all the way into the master bedroom! 
 
Hope you enjoyed the tour!
 
Next, we are on to a big install this Friday.  Installing brand new drapes, furniture and accessories for another wonderful client.  Her entire downstairs will be transformed!  I'm so excited and feeling blessed that I get to do what I absolutely love!


See more before and after photo's on my website DecRenew Interiors
Follow me on Facebook here
  

"ONE by ONE" Uniquely Renewed Furnishings & Accessories

So excited to launch a new adventure as part of
 DecRenew Interiors - Fine Decorating on a Budget


As most of you know, I love to make old things new.  I'm constantly find myself around great furniture and accessory finds that need a makeover.  I'm drawn to items that look eclectic &  interesting and I feel I have the eye to envision them turned into something wonderful.  Sometimes I will just purchase an item because it's cool and I know I can create something out of it at some point. 

 I finally decided to take the plunge and start
 ONE by ONE - Uniquely Renewed Furnishings and Accessories. 

I realize it's adding more to my already busy plate but it's my passion and I can't let it go.  So here goes!!!

See some before and after items I've done in the past to give you a flair of what's to come.

BEFORE

AFTER


BEFORE

 
AFTER
 
 
BEFORE
 
 
AFTER
 
 
BEFORE
 
AFTER


It will be a collection of unique, renewed furniture along with accessories (lamps, pillows, etc.) that will be available to purchase for all my local followers.

Below are two chairs that are getting their overhaul this week at the workshop.  They just got painted a distressed black and they will be reupholstered in a fabric similar to the above black and white velvet geometric fabric.  I can't wait to get rid of the yellow, urggg.

  I've named this pair "Mr. and Mrs"

BEFORE

 
Hope you will join me for the ride. My facebook page has been created but I don't have much activity yet.  My facebook page will be up soon.
 
Thanks for your continued support and encouragement!  I appreciate all of you so very much!